So in my last blog found Here I was planning to do a tutorial to go with it, however that blog was getting a little long and I wouldn't be able to do the tutorial to the extent that I want to without having a ridiculously long blog that even I don't want to read through to fix my grammar and spelling mistakes. So here we have this blog, in this installment of my Game Dev related rants/ information blurbs I will teach you how to create Bloom in GLSL(it will show you code from multiple fragment shaders and my vertex shader and explain it), Photoshop and Maya as well as some cool shit that may or may not be useful for you in the future. Well ON TO THE TUTORIAL!!!
BLOOM IN PHOTOSHOP
The version of Photoshop I'm using is CS6 (64-bit) however the technique to create the Bloom effect in Photoshop is extremely similar if not the same for most if not all versions of this software.Now the first thing you need is to have either an image or drawing that you are currently working on, creating Bloom in this will work best if you have multiple layers, that separate your line art and you coloring, as well as the coloring that you want to have the bloom effect on.

Step 1: Separate Layers
Step 2: Duplicate Layers
Select the layers you want to have the Bloom effect and duplicate each layer. You will be applying the Bloom effect on these duplicated layers.

While on the duplicated layer select the filter tab at the top of the screen and move your mouse over the Blur option. An additional window will show up showing you a few different options regarding the types of blur you can apply, select the Gaussian Blur option.

So once you have selected the Gaussian Blur filter it is important to fiddle with the settings for the blur until you achieve the effect you are looking for, on my window I have it zoomed out to 8% in order to see how the Bloom effect is going to turn out. Ensure that you have preview click so that you can see what the filter will do before you apply it, this will ensure that you don't over filter the layer and basically put a weird tint on the whole image. By adjusting the radius of the pixel you can control how blurred the Gaussian Blur will be and how wide the blur will spread. Currently I have mine set to 123.4 however you may need it to be different depending on the image you have.

Now you are probably wondering why your Bloom layer isn't glowing like Bloom should it just kinda looks blurry, well that is because currently your Bloom layer (previously your duplicated Layer) is the same type of layer as the rest of the layers and is only showing the blurring you did to the layer. To achieve the glowing Bloom effect you need to merge it with the original layer, however you cannot just merge the two layers together since it will just give you the same problem. To fix this you need to change the layer type from normal to screen.

Now once you have changed the layer type you should see that your filtered Bloom layer has a nice glow to it, giving you your desired effect. Now all you have to do is repeat the previous steps on any other areas you want to have Bloom and you are done.
Results:
As you can the below image looks completely different with and without Bloom, use Bloom to add a great pop to your backgrounds, concept art or any side projects you are currently working on.
No Bloom Bloom


BLOOM IN MAYA
I'm currently using the 2014 version of Maya and also have a lot of the built in plug-ins turned on, don't worry because I will show you which plug-ins you need to turn on in order for your tutorial to be effective.
So in Maya we are going to be using Mental Ray to create the Bloom glow effect, if you don't have the Mental Ray option you can set it up by following these few steps:
Step 1: Open the Window Tab
Step 2: Hover over Settings/Preferences
Step 3: Click Plug-In Manager
Step 4: Scroll until you find Mayatomr.mll and select Load/Auto Load
Step 5: Close Window
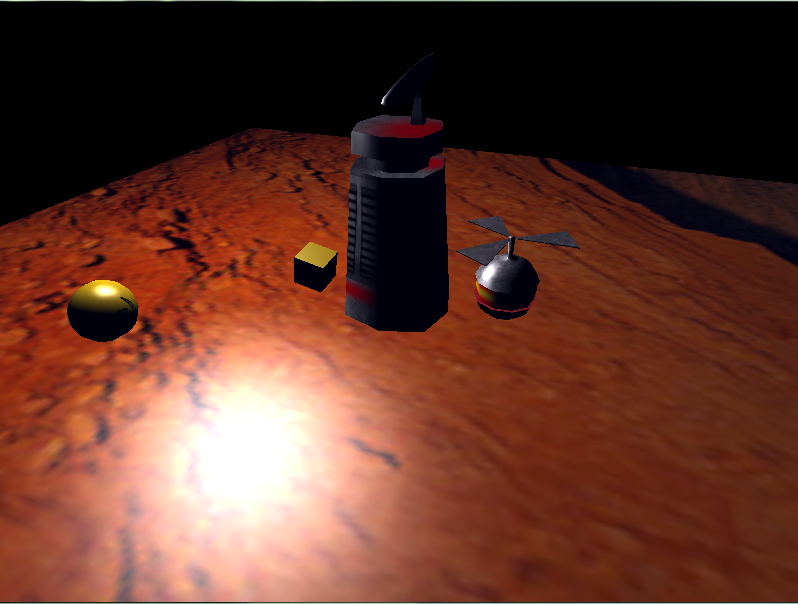
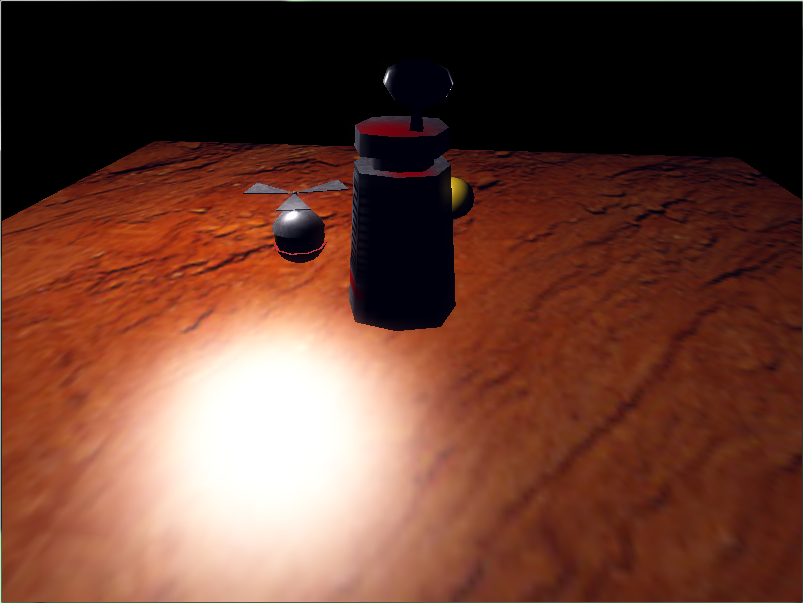
Now that you have the Mental Ray plug-in set up we are ready to start creating Bloom, you are going to need an scene full of objects in order to see the glow properly. I'm going to be showing you the effect on the objects I have labeled with red arrows so you know which ones I'm working on.

We are going to assign the Material Mia_Material_X to our objects, this material is located under Mental Ray.


Select Mia_Material_x in the attribute editor, and scroll down until you reach the Advanced Tab. Click the checkered box beside Additional Color, then scroll down to click textures under the Mental Ray section and select Mia_light_surface.


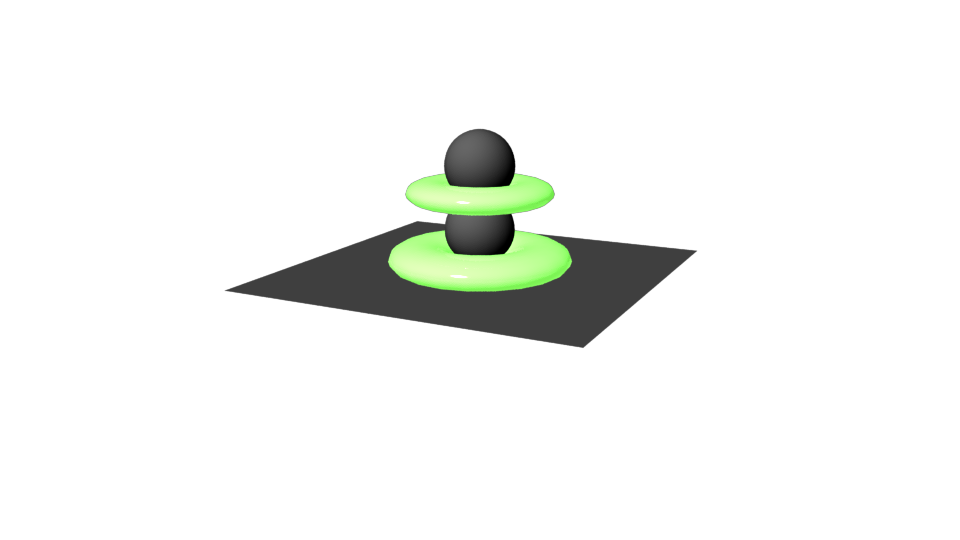
Now you are going to see an open tab called Mia_Light_Surface 1, in this tab you will see a option called Parameters. We are going to change the color to whatever color you want your glow to be, in this case I am going to make it green since its my favorite color.

Step 4: Open and Adjust Render Settings
Under the render settings, in the Common tab you want to scroll all the way to the bottom to Render Options and turn off Enable Default Light.

Before closing the Render Settings, go across to the Indirect Lighting Tab and turn on Final Gathering.

Going back to the Attribute Editor while Selecting your objects click the checkered Box beside additional color in the advanced tab, and you will see an option called fg Contib, this controls how much Final Gathering there will be. Increase this to a higher value such as 10 and edit the the intensity to about 0.9, which will give you a glow when you render.

Results:
By playing around with these settings, you can achieve a interesting Bloom effect in Maya. You can also play around with the Final Gathering options Under the Indirect Lighting Tab in the Render Settings to give you a different effect.
BLOOM in GLSL
So my code is going to be using the glsl shader language, version 330 which has variables specific to my project so if it doesn't work for you don't worry you may just need to play around with a few things or rewrite it so it works with your project.Now in C++ code creating a Bloom effect involves numerous steps, the easiest way to remember what you need in order to create Bloom is to always refer to this diagram:
->This is essentially what steps are needed to create a Bloom effect in C++
(1) (2) (3) (4)
_______ ______
| | ____ ____ | |
| scene | --> |Tone| ---> |Blur| ----> ((+)) ---> | YAY! |
|_______| |____| |____| ^ |______|
| downsize downsize | |
| |
|____________________________________|
The first thing you need to do is render the scene you want to add Bloom to, you need to include both Your Vertex and Fragment shader. You will need to use a Pass Through Vertex shader which will look very similarly like this:
layout (location=0) in vec4 position;
layout (location=2) in vec3 normal;
layout (location=8) in vec2 texcoord;
uniform mat4 mvp;
out vertex
{
vec3 positionObj;
vec3 normalObj;
vec2 texcoordObj;
} data;
void main()
{
// mandatory!
gl_Position = mvp * position;
// additional info
data.positionObj = position.xyz;
data.normalObj = normal;
data.texcoordObj = texcoord;
}
This shader will performs the clip transformation and passes all relevant attributes down the pipeline. The next shader you will need is your starting Fragment shader that applies both the lighting and the texture in the scene (Now if your project or engine already is applying lighting probably won't have to worry about it), which will look very similar to this:
in vertex
{
vec3 positionObj;
vec3 normalObj;
vec2 texcoordObj;
} data;
uniform vec3 eyePos;
uniform vec3 lightPos;
uniform sampler2D diffuseTex;
layout (location=0) out vec4 fragColour;
vec3 PhongLighting(in vec3 fragPos, in vec3 fragNorm, in vec3 diffuseColour)
{
// specular colour:
// diffuse map provides diffuse colour... why not a specular map?
// (it doesn't have to be white reflecting back at us)
const vec3 specularColour = vec3(1.0);
const float shininess = 10.0;
// ...this is generally a dark constant
const vec3 ambient = vec3(0.00, 0.00, 0.05);
// diffuse component
vec3 N = normalize(fragNorm);
vec3 L = normalize(lightPos - fragPos);
float Lambert = max(0.0, dot(L, N));
// specular coefficient
vec3 E = normalize(eyePos - fragPos);
vec3 R = reflect(L, N);
float Phong = max(0.0, dot(R, -E));
Phong = pow(Phong, shininess);
// add components
vec3 diffuse = Lambert * diffuseColour;
vec3 specular = Phong * specularColour;
return ( diffuse + specular + ambient );
}
void main()
{
vec3 diffuseColour = texture(diffuseTex, data.texcoordObj).rgb;
fragColour.rgb = PhongLighting(data.positionObj, data.normalObj, diffuseColour);
}
The next step is to locate all the bright areas in scene which you need to use a Bright Pass/ Bright Tone fragment shader that will locate and isolate the bright areas of the scene. This fragment shader looks very similar to the following:
in vec2 passTexcoord;
uniform sampler2D sceneImg;
uniform float middleGrey;
layout (location=0) out vec4 fragColour;
float relativeLuminance (in vec3 rgb)
{
return (0.2126*rgb.r + 0.7152*rgb.g + 0.0722*rgb.b);
}
vec3 brightPass(in sampler2D img, in vec2 uv, in float middle)
{
vec3 colour = texture(img, uv).rgb; //makes image appear on screen
float lum = relativeLuminance(colour);
float bright = pow(lum, (middle/lum));
return vec3(bright*colour);
}
void main()
{
fragColour.rgb = brightPass(sceneImg, passTexcoord, middleGrey);
}
After finding the Bright Pass, you need to apply a Gaussian on top the bright Pass, I will be blurring the bright Areas with a Box Blur, however you will get a better result with a Gaussian Blur. In the Box Blur Fragment shader we are sampling from the image and creating the blur effect by using a Kernal Map. Another easy way to create the blur would to basically shrink the image down and then re-size it. The Box Blur Fragment shader will look very similar to the following:
in vec2 passTexcoord;
uniform sampler2D sceneImg;
uniform vec2 pixelSize;
layout (location=0) out vec4 fragColour;
//Box Blur
//You create a box blur using a Kernal map
vec3 boxBlur( in sampler2D img, in vec2 centerUV, in vec2 pixel)
{
vec2 offsetUV;
vec4 totalSample = 1.0*texture(img, centerUV);
//bottom left
offsetUV = -pixel;
totalSample += 1.0*texture(img, centerUV+offsetUV);
//optimization
//we are going to weave through this Kernal
//this is the Kernal we are sampling from
// |1|1|1|
// |1|1|1|
// |1|1|1|
//center bottom
offsetUV.x = 0.0;
totalSample += 1.0*texture(img, centerUV+offsetUV);
//bottom right
offsetUV.x = +pixel.x;
totalSample += 1.0*texture(img, centerUV+offsetUV);
//center right
offsetUV.y = 0.0;
totalSample += 1.0*texture(img, centerUV+offsetUV);
//center left
offsetUV.x = -pixel.x;
totalSample += 1.0*texture(img, centerUV+offsetUV);
//top left
offsetUV.y = +pixel.y;
totalSample += 1.0*texture(img, centerUV+offsetUV);
//top center
offsetUV.x =0.0;
totalSample += 1.0*texture(img, centerUV+offsetUV);
//top right
offsetUV.x = +pixel.x;
totalSample += 1.0*texture(img, centerUV+offsetUV);
//average
totalSample/= 9.0;
return totalSample.rgb;
}
void main()
{
//box blur
fragColour.rgb = boxBlur(sceneImg, passTexcoord, pixelSize);
}
Just like in Photoshop, just blurring the Bright Pass will not create an effective Bloom effect, you need to add it back to the original scene by screening it over the original Scene which will intensify the Bright Areas, creating a glow effect. To do this you need a Screen Composite Shader that will add the blurred bright areas back into the original scene, you can achieve this with 3 different methods, Blending the Image, creating a Multiply or screening the image which is the method I will be showing you. Your Screen Fragment Shader should look very similar to the following:
in vec2 passTexcoord;
uniform sampler2D sceneImg;
uniform sampler2D postProcImg;
layout (location=0) out vec4 fragColour;
//Screening
//This inverts the layers
//and multiples the result
vec3 screen(in sampler2D img0, in sampler2D img1, in vec2 uv)
{
vec3 colour0 = texture(img0, uv).rgb;
vec3 colour1 = texture(img1, uv).rgb;
vec3 product = (1.0 - colour0) *(1.0 - colour1);
return (1.0 - product);
}
void main()
{
fragColour.rgb = screen(sceneImg, postProcImg, passTexcoord);
}
Results:
Original With No Bloom Bloom Applied
By following the correct steps you can create interesting and more realistic scenes using Bloom. Some Pro tips when creating Bloom in GLSL C++ shader language, use tone maps instead of numbers since it is easier to make bright areas brighter and takes less memory to do so. You can create the maps in Photoshop, which should be in grey scale with adjusted Luminance. By doing this you can easily create ton maps for your Bloom effect.
In addition, when using a Gaussian Blur for Bloom you need to remember that it takes into account more pixels and uses weighting. This weighting comes from Pascals Triangles, which an example to the 7th pass in the triangle is shown below:
1
1 1
1 2 1
1 3 3 1
1 4 6 4 1
1 5 10 10 5 1
1 6 15 20 15 6 1
If you want a higher dynamic range in your Bloom effect try splitting up the post processing into multiple stages and repeat the Grabbing Bright Pass and Blurring steps, then add the original scene with all the iterations, which will not only give you a higher dynamic range but will also ease out the blurring and make your scene more realistic.
No comments:
Post a Comment